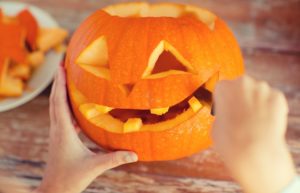
How to Decorate Your Halloween Pumpkin!
By Wilmer Romero on Oct 18, 2016 in Home & Lifestyle
Nothing says Halloween like a glowing jack-o-lantern adorning your front porch. But getting that picture-perfect look can present some challenges. Whether you prefer an intricate work of art or a simpler, classic face, these 7 tips are sure to help you create the best looking Halloween pumpkin around.
 Upside-Down – Forget the traditional way of cutting and scooping out your pumpkin. Instead of cutting a hole on the top, cut out the bottom. This will allow you to place a candle securely on a non-flammable surface, light it, and place the hollow pumpkin over the flame. No more burnt fingers while trying to light a candle inside a pumpkin.
- Light it Up – Instead of using traditional candles, which can easily be extinguished or knocked over, opt for an LED candle to illuminate your gourd. You can even get one that imitates the flickering of a real flame.
- A Cut Above – Perhaps one of the least-appreciated aspects pumpkin carving is gutting it. You can speed up the process and minimize the whole slimy hands thing by cutting a half circle on the top, then making a square or rectangular cut down the side, making sure to keep the cut-out in one piece. The side cut allows for greater mobility when using a spoon to remove the pulp.
- The Drill – For a creative spin on the traditionally carved jack-o-lantern, put your power tools to work. Remove the pulp from your pumpkin as you normally would, then use a drill to create dotted patterns in the pumpkin. You can even use different sized drill bits for the sake of variety.
- Hydrate – There’s nothing like watching your masterpiece slowly shrivel up and rot. To keep it hanging in there a little longer, apply petroleum jelly to the cut surfaces as well as the ollowed out inside. This will hydrate your pumpkin and slow down the “aging” process.
- Stay On Track – If you’re using a stenciled design, you can simplify the process by taping the stencil to the pumpkin and using thumbtacks to poke tiny holes along the outline. When you’re done, sprinkle baby powder over the surface to make the holes easier to see while carving.
- Leftovers – Have a lot of scraps after you’ve finished carving your pumpkin? Don’t toss them, reuse them! You can use excess pieces to make ears, noses, hands, feet, and more. Use toothpicks or bamboo skewers to attach the scraps to your pumpkin.
Happy Halloween from all of us at Your 1 Plumber.

Post a Comment
You must be logged in to post a comment.